Manage Teams
Available for Enterprise and Business users.
Glossary
- The brand represents your individual or company name, design, symbol, or other product feature that is distinct and is used for marketing, advertising, etc.
- The region is a collection of countries. You can create a customized name for a region and add countries to this region. To create a region, first, a brand needs to be selected.
- The team consists of Members and Social Networks. To create a team, a brand and a country first need to be created.
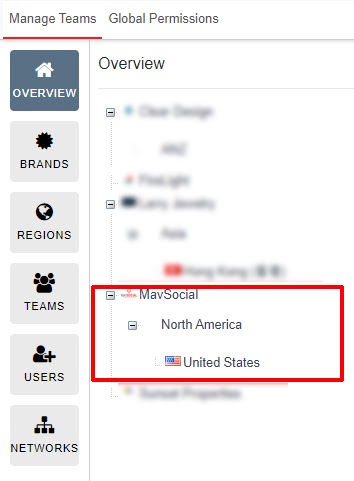
In the Overview section, you can view the teams and brand’s structure. After creating Brands, Regions, Teams, Members, and Social Networks, you can see the hierarchical structure. By clicking on each component, you can directly go to relevant details.
For more information, refer to the following sections.
- How to Add Brands
- How to Add Regions to a Brand
- Editing Regions
- Adding and Editing Teams
- Deleting Teams
- Assigning Members and Networks to Team
- Adding/Editing Members
- Deleting Members
- Adding/Editing Networks
- Deleting Networks
- Managing Team Workflow
How to Add Brands
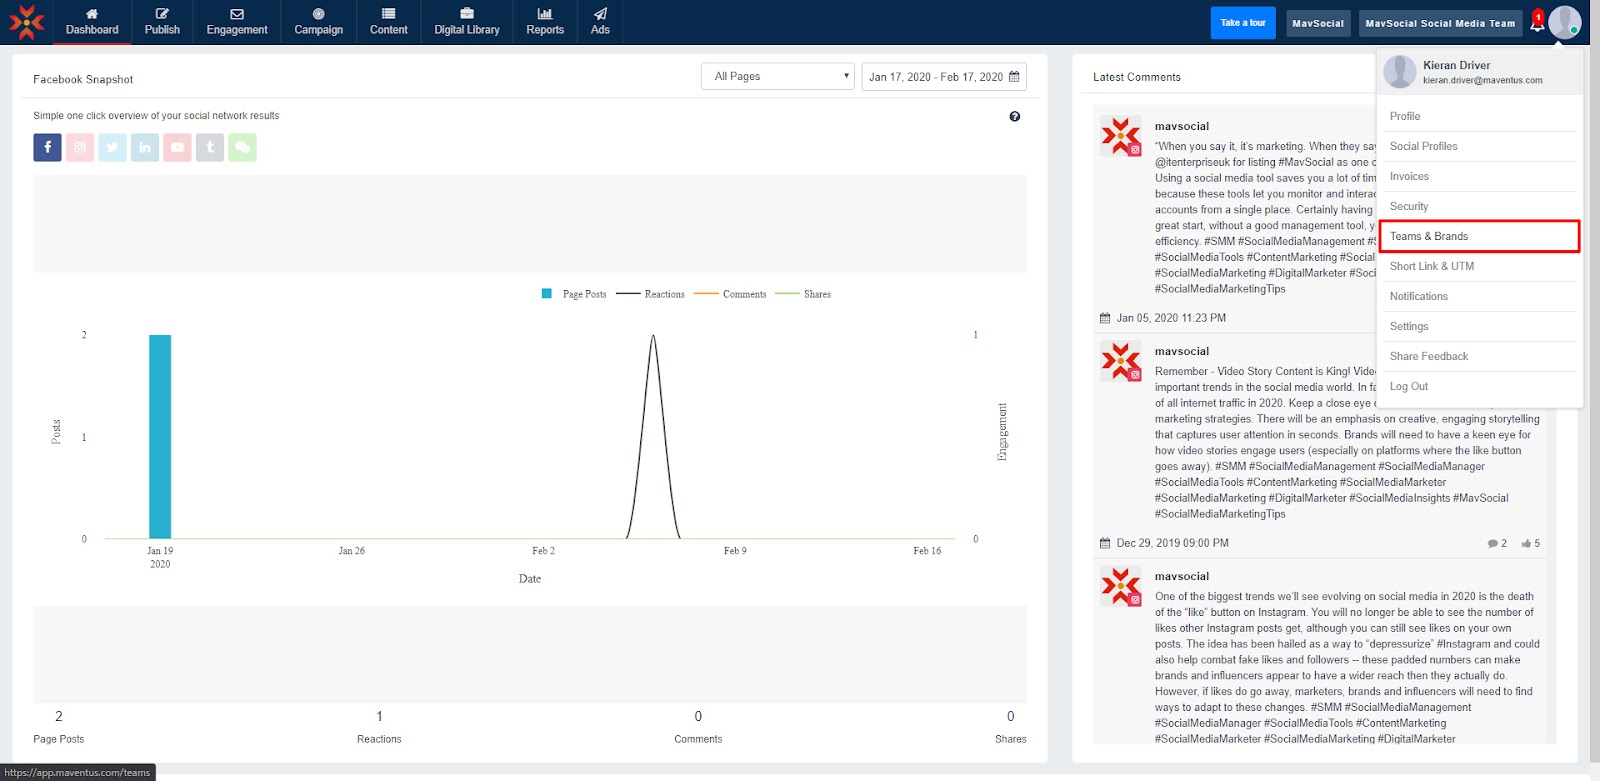
- Click on your MavSocial account icon in the top-right corner of MavSocial, and navigate to Teams & Brands from the dropdown menu.
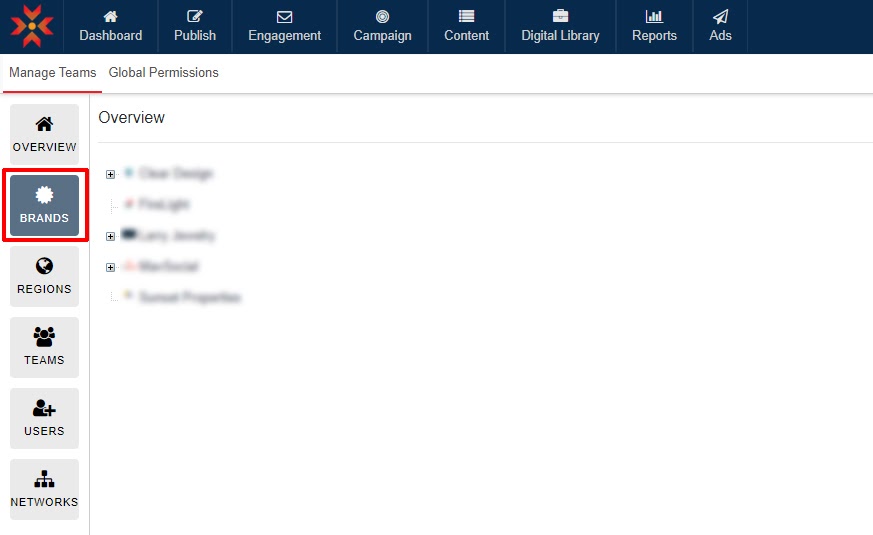
- Here click on the Brands tab.
 The Teams & Brands Management/Brands page will be displayed.
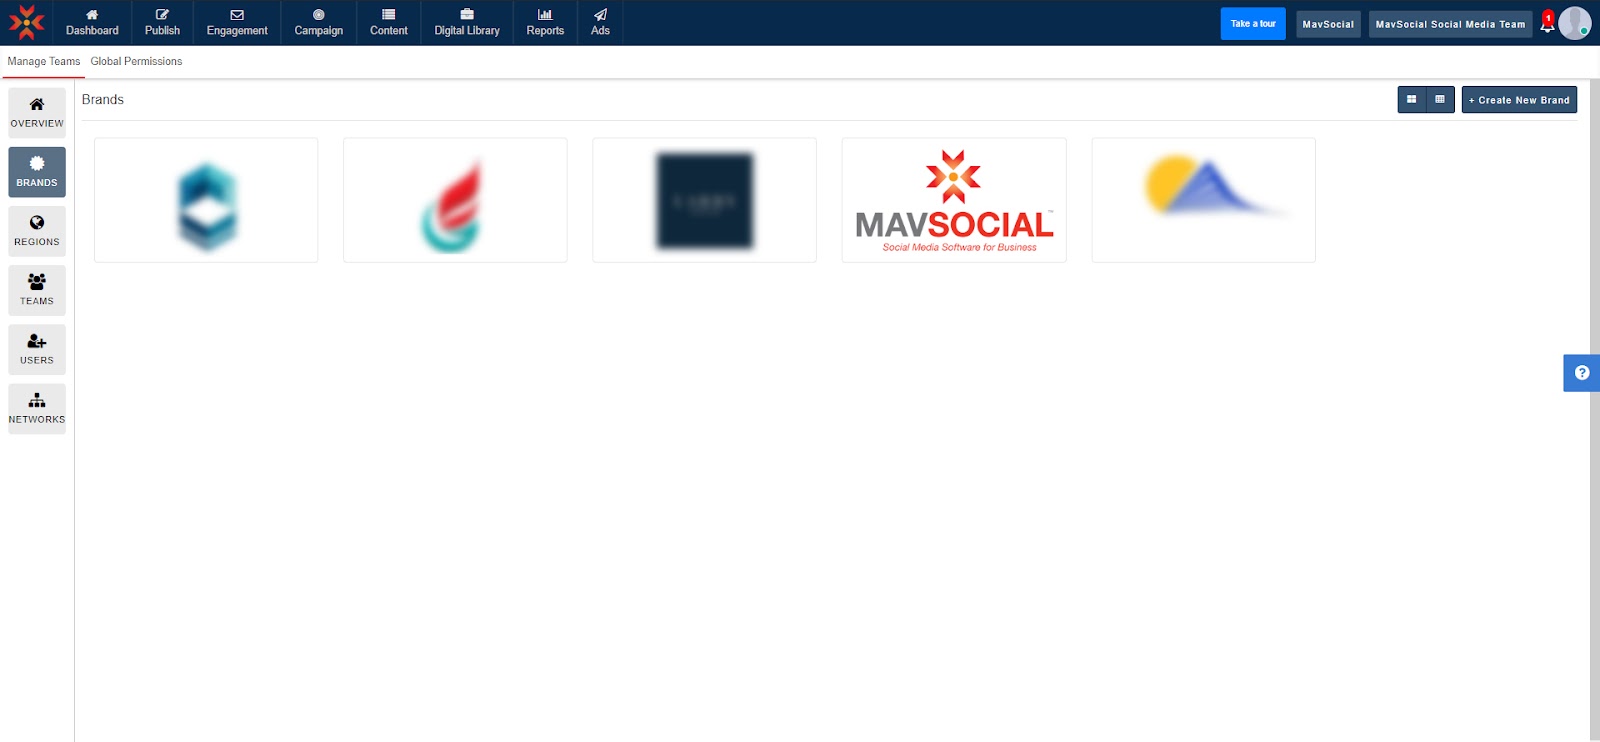
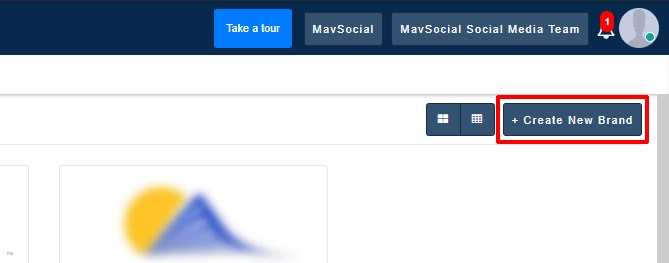
- To add a new brand, click Create New Brand in the top-right corner.
- Upload the brand logo from your computer and type the brand name and guidelines in the corresponding boxes.

When finished, click Create in the bottom-right corner.
How to Add Regions to a Brand
If you have different members of your social media teams operating in different geographies, you may want to add Regions to your brands.
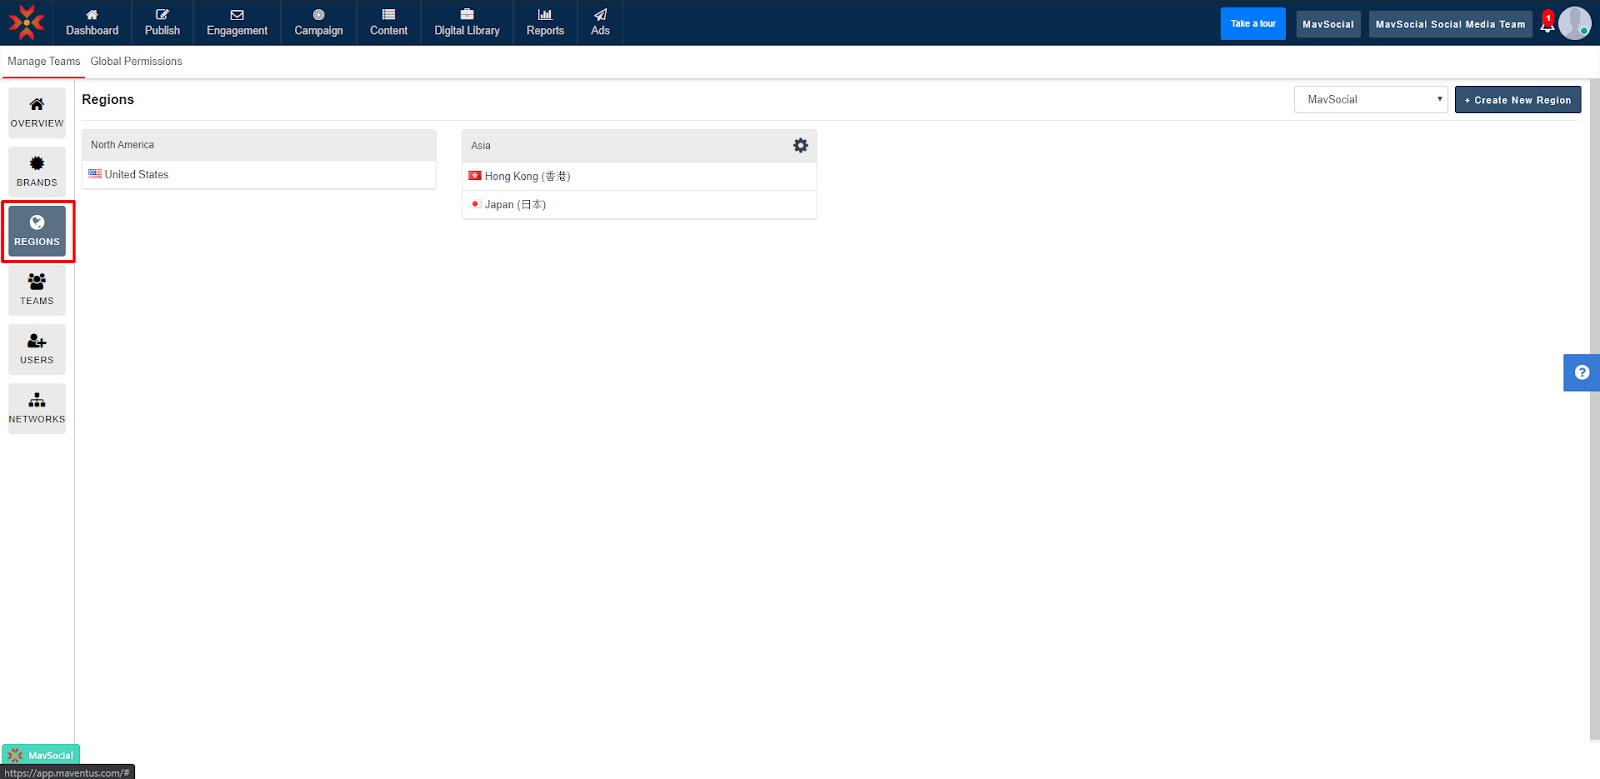
- Click the Regions tab under the Manage Teams menu on the left-hand side of the screen.
- Click Create New Region in the top-right corner.

- Create your brand’s region by selecting the brand for which you would like to create the region, name, the region, and choose the countries you wish to include in the region by checking the checkboxes.
You can also select “Global” if you wish to include all countriesin the region.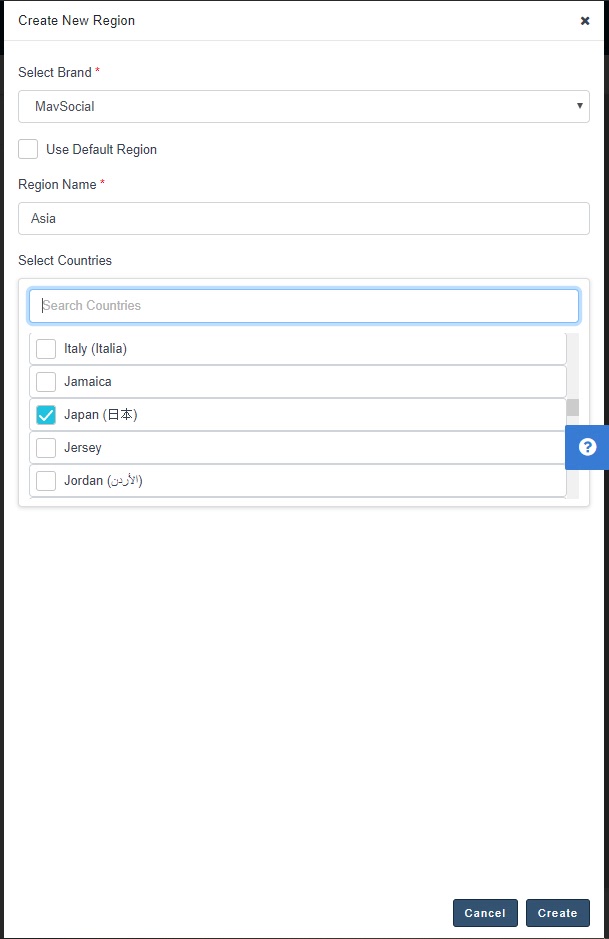
- Press Create in the bottom-right corner, and a notification will show that your region has been created.
Editing Regions
- Click on your MavSocial account icon in the top-right corner of MavSocial, and navigate to Teams & Brands from the dropdown menu.
- Click Regions on the menu on the left-hand side of the screen.
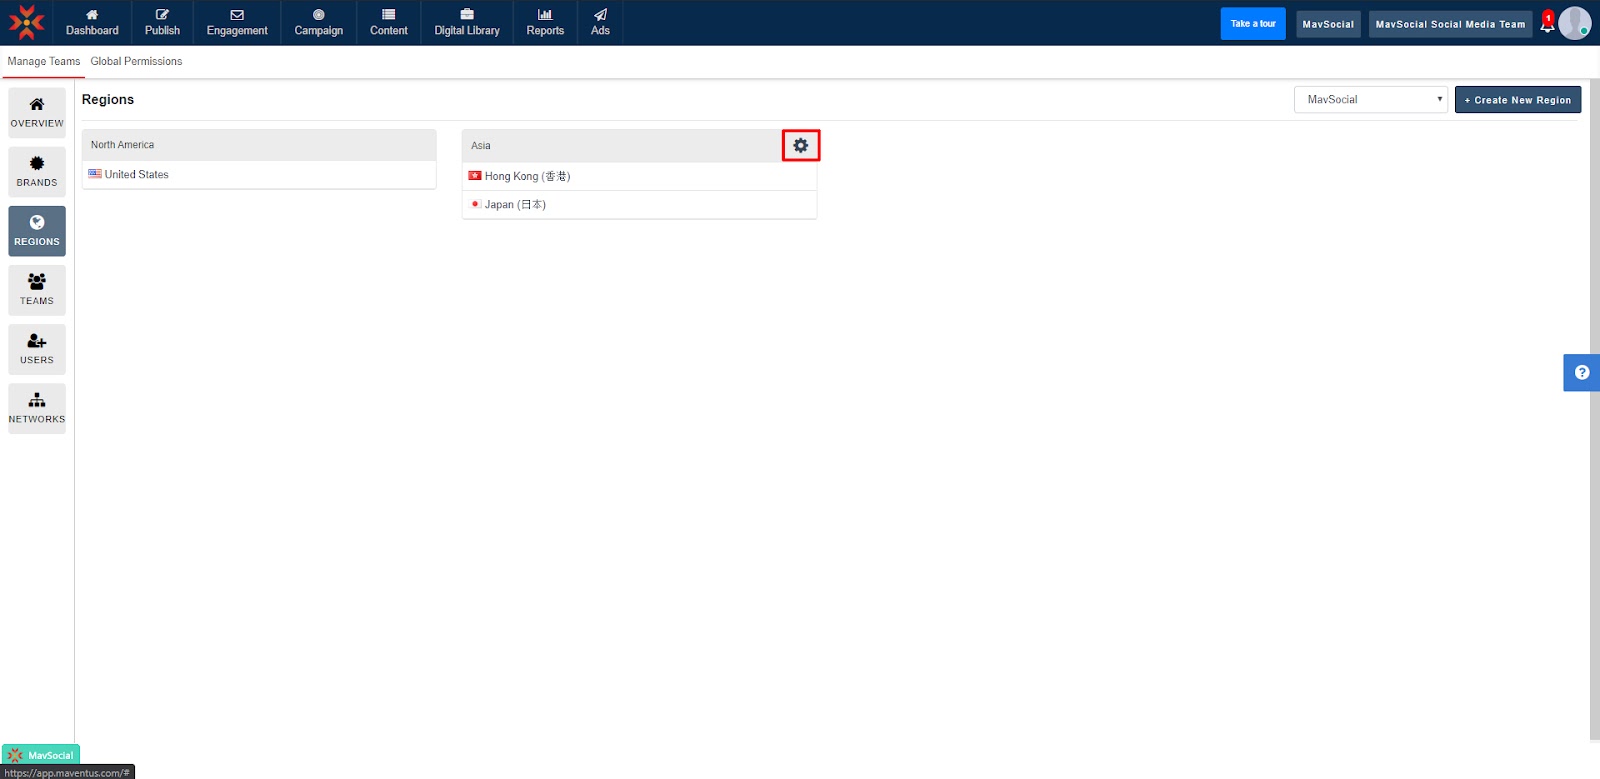
- Hover your cursor over the region you wish to edit, and a small settings icon will appear. Click the Settings icon.
- Here, you can change the name of the region and add or remove countries. Add or remove countries by searching them in the text box and checking/unchecking the checkboxes.
- Click Update to save your edits.
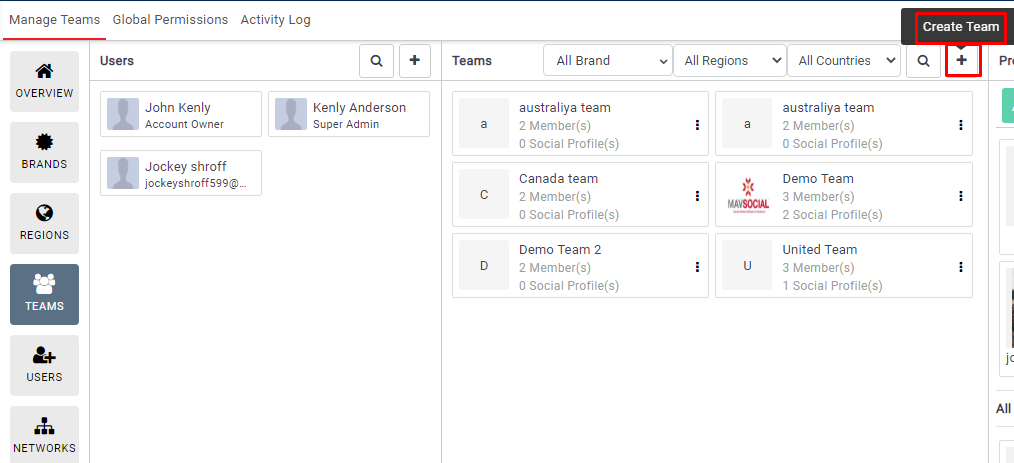
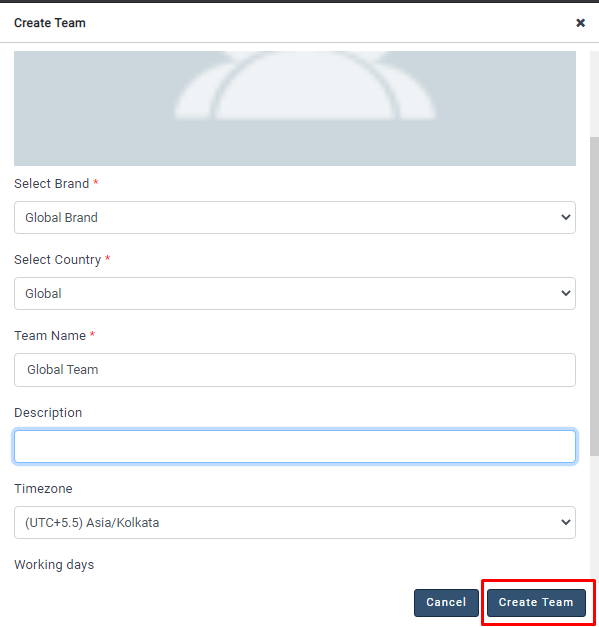
Adding and Editing Teams
- Click on your MavSocial account icon in the top-right corner of MavSocial, and navigate to Teams & Brands from the dropdown menu.
- Navigate to the Teams tab.
- Click Create Team to begin creating a new social media team.
- You can optionally upload a logo for your team by clicking on the image space and select a file from your computer.
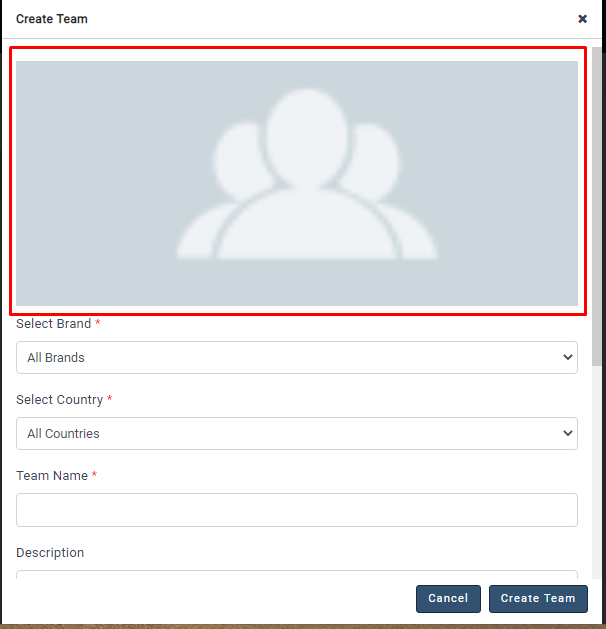
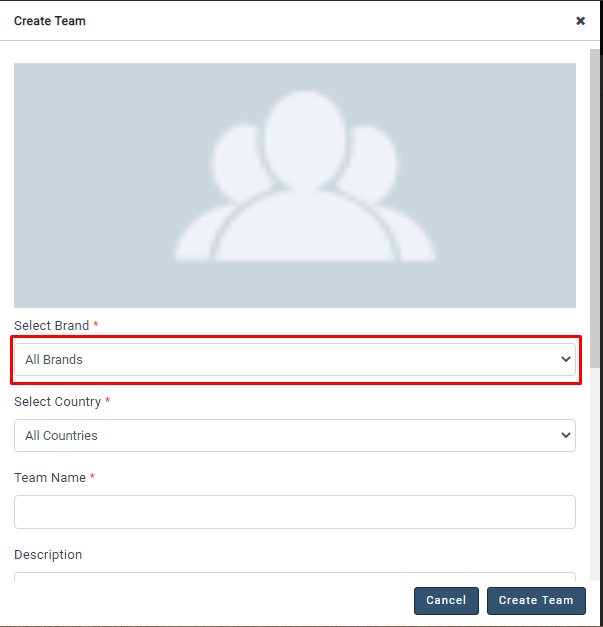
- Select the Brand under which you would like to create the social media team.
- Select the region/countries that this team will operate.
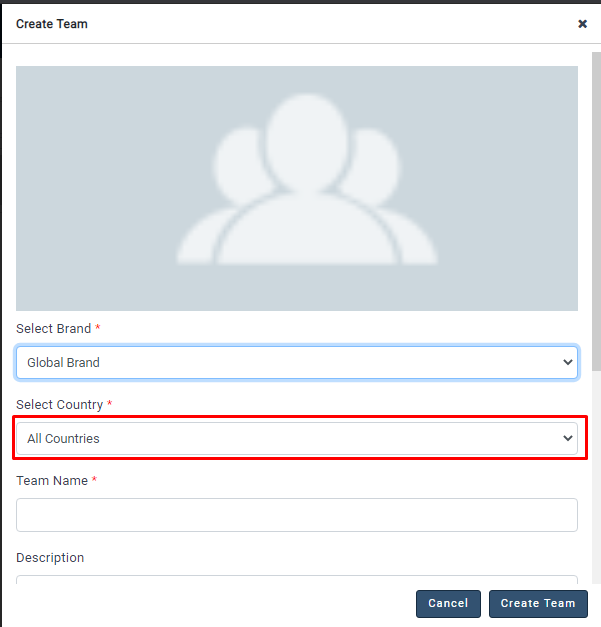
- Give your team a unique name and description to make it easy to identify.
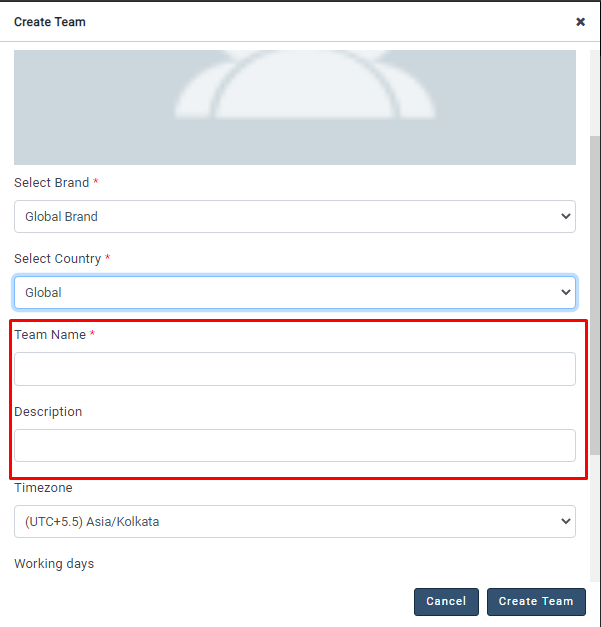
- Click Create Team in the bottom-right corner to save your changes and create the team.
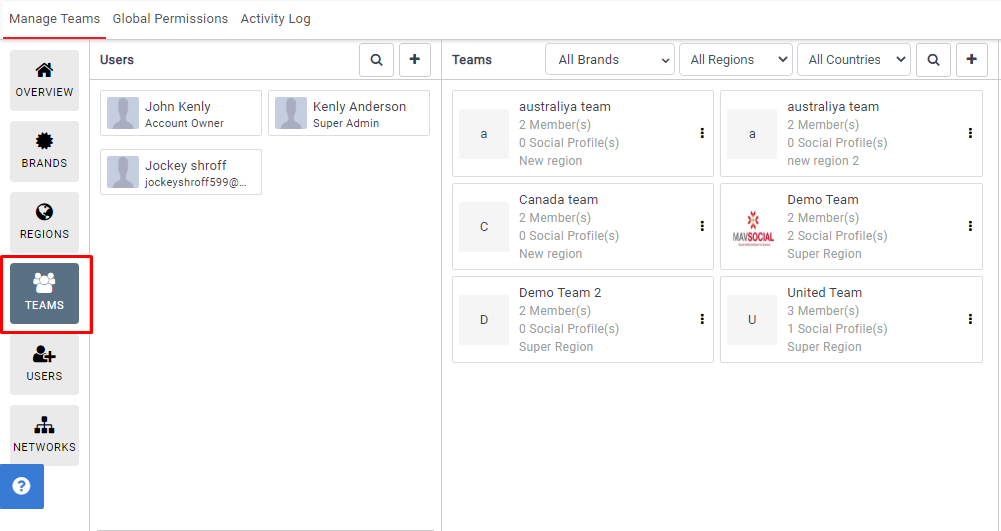
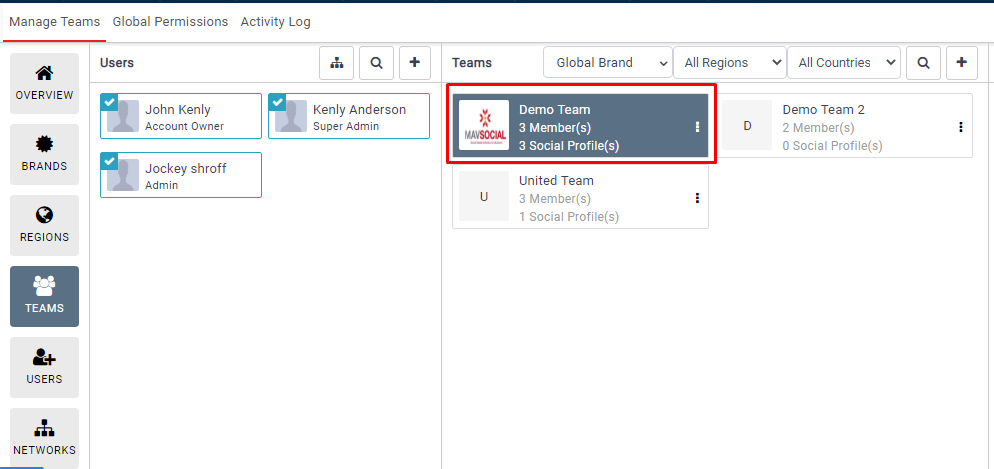
Assigning Members and Networks to Teams
- Click on your MavSocial account icon in the top-right corner of MavSocial, and navigate to Teams & Brands from the dropdown menu.
- Navigate to the Teams tab.
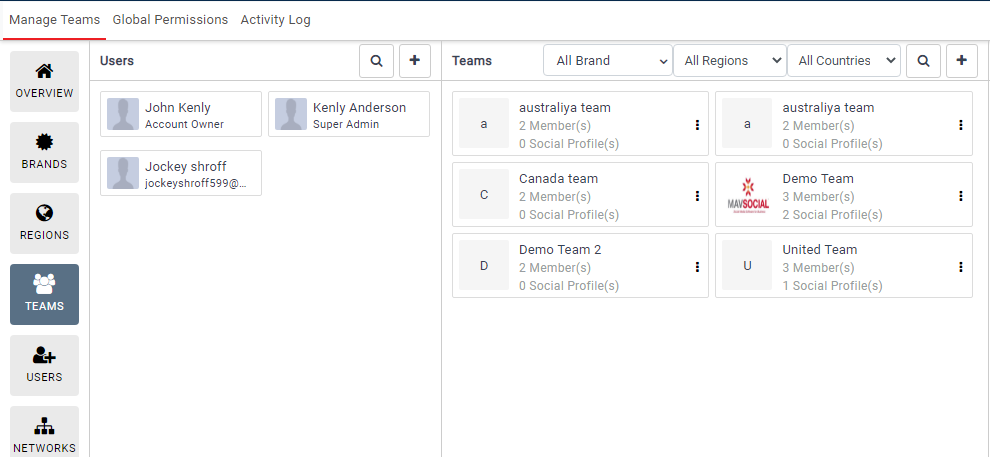
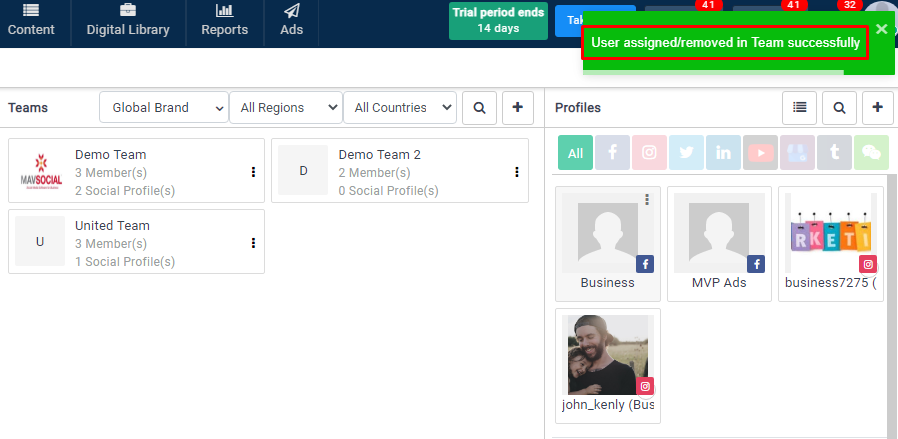
- You will see your teams in the middle and the users on the left side. To add a user to one of your teams, just select the user and click on the update button.
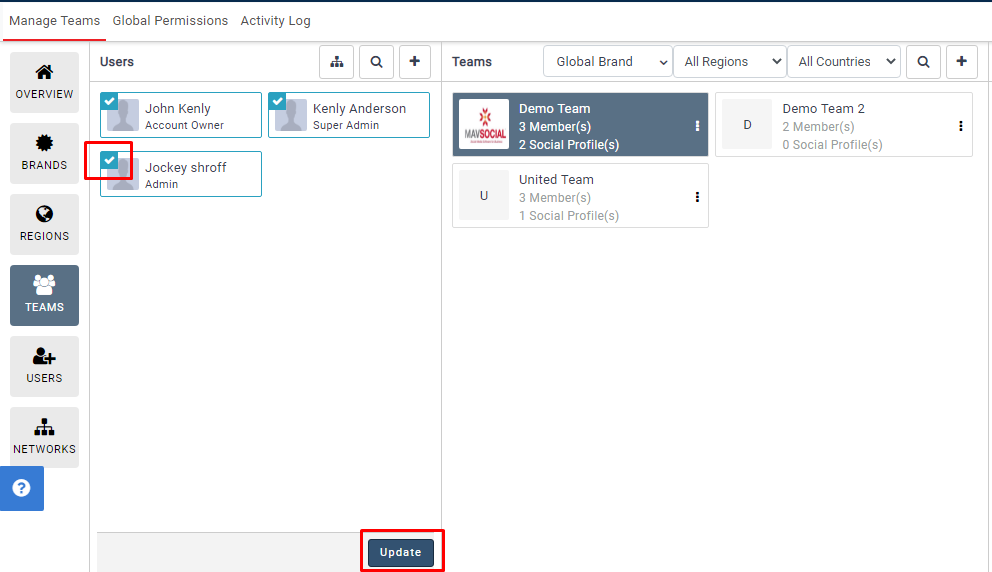
- The selected member will be added to the Team after clicking on the update button
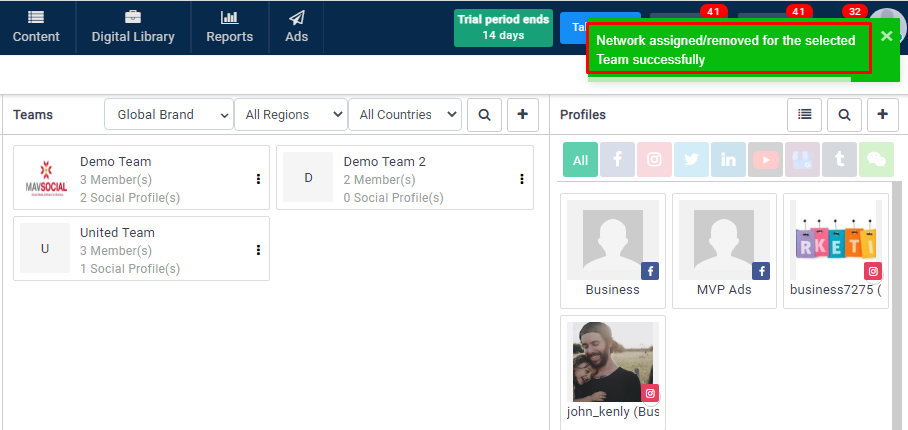
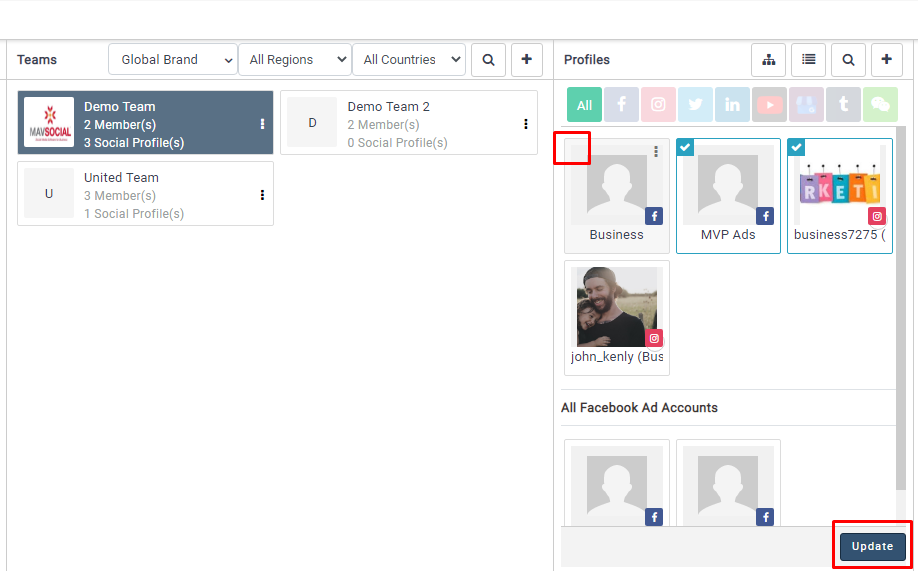
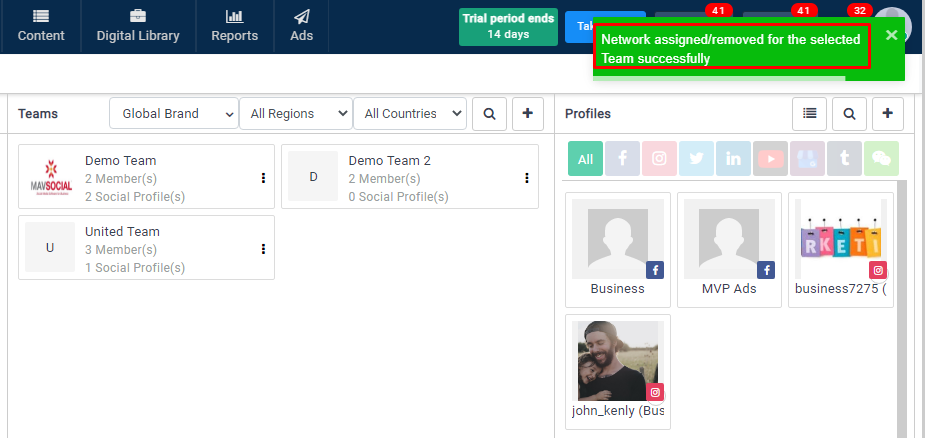
- You will see your Teams in the middle and the profiles on the right side. To add a profile to one of your teams, just select the profile and click on the update button.
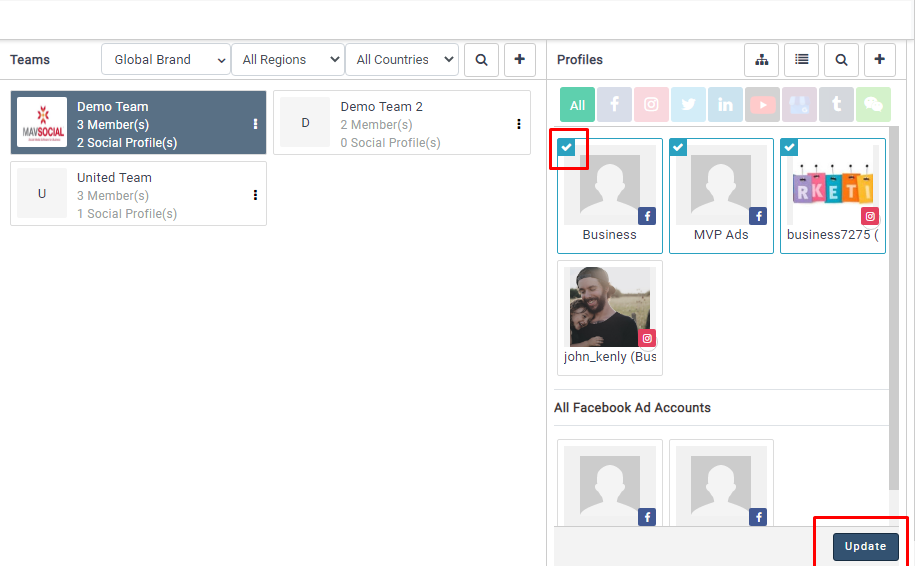
- The selected profile will be assigned to the Team after clicking on the update button.
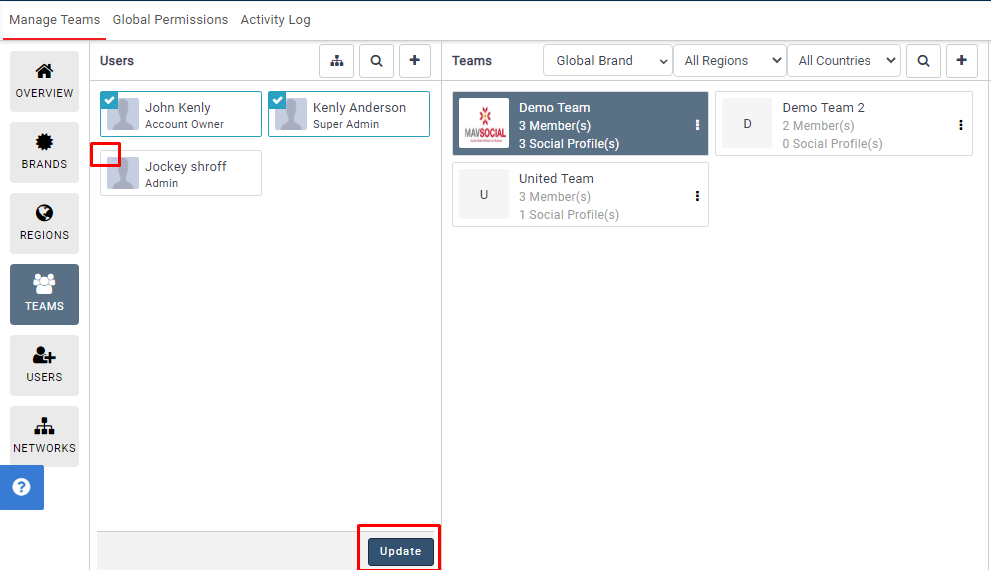
Removing members and networks from a Team
- Click on your MavSocial account icon in the top-right corner of MavSocial, and navigate to Teams & Brands from the dropdown menu.
- Navigate to the Teams tab.
- Click the team from which you would like to remove a user/member.
- You will see your Teams in the middle and the users on the left side. To remove a user from one of your teams, just unselect the user and click on the update button.
- Or click the options(
 ) icon and click Remove From Team from the dropdown menu.
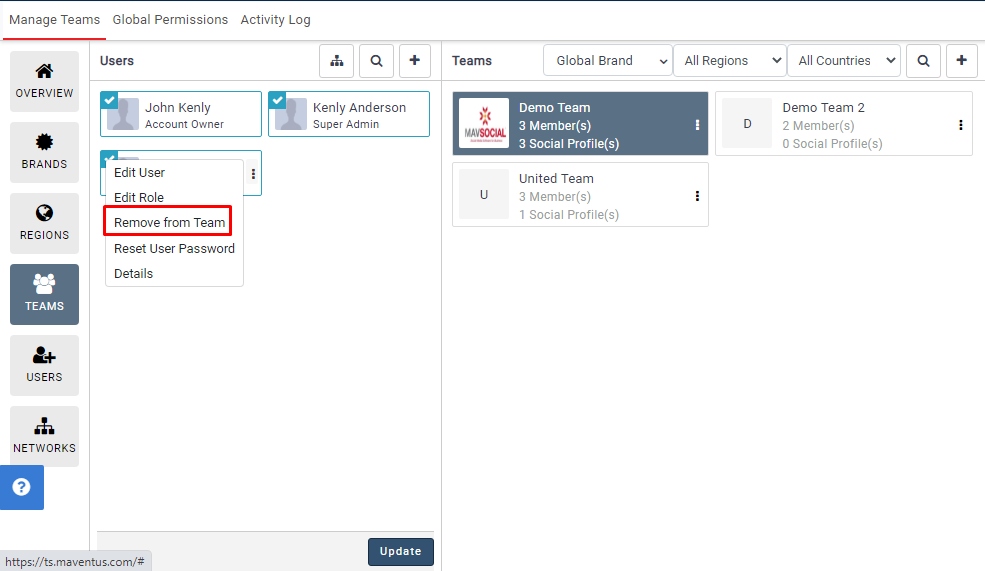
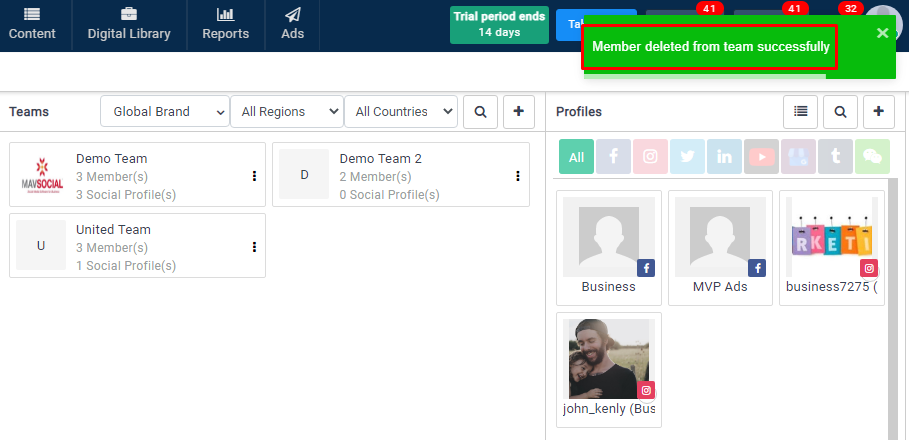
- The user has been removed from the team.
- You will see your Teams in the middle and your profiles on the right side. To remove a profile from one of your teams, just unselect the profile and click on the update button.
8. The profile will be removed from the team
Deleting a Team
- Click on your MavSocial account icon in the top-right corner of MavSocial, and navigate to Teams & Brands from the dropdown menu.
- Navigate to the Teams tab.
- Select the Team that you wish to delete, and press the small settings icon that appears on the right side of the box.
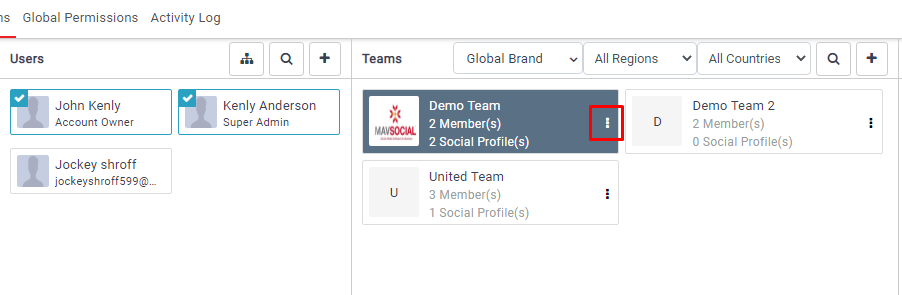
- Click Delete Team from the menu.
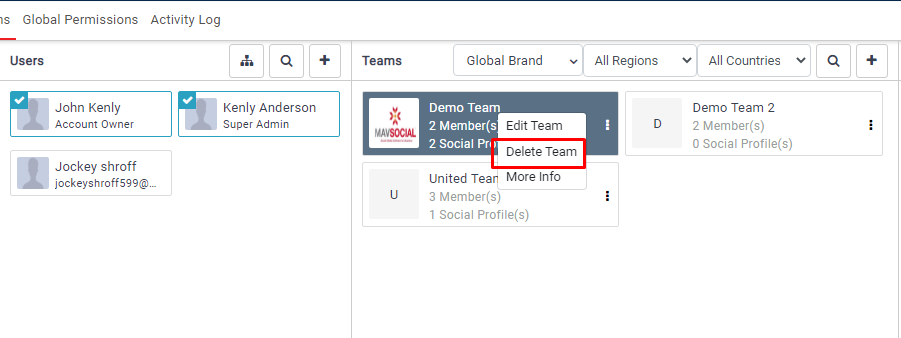
- Your team will be deleted.
Adding New Members/Users
- Click on your MavSocial account icon in the top-right corner of MavSocial, and navigate to Teams & Brands from the dropdown menu.
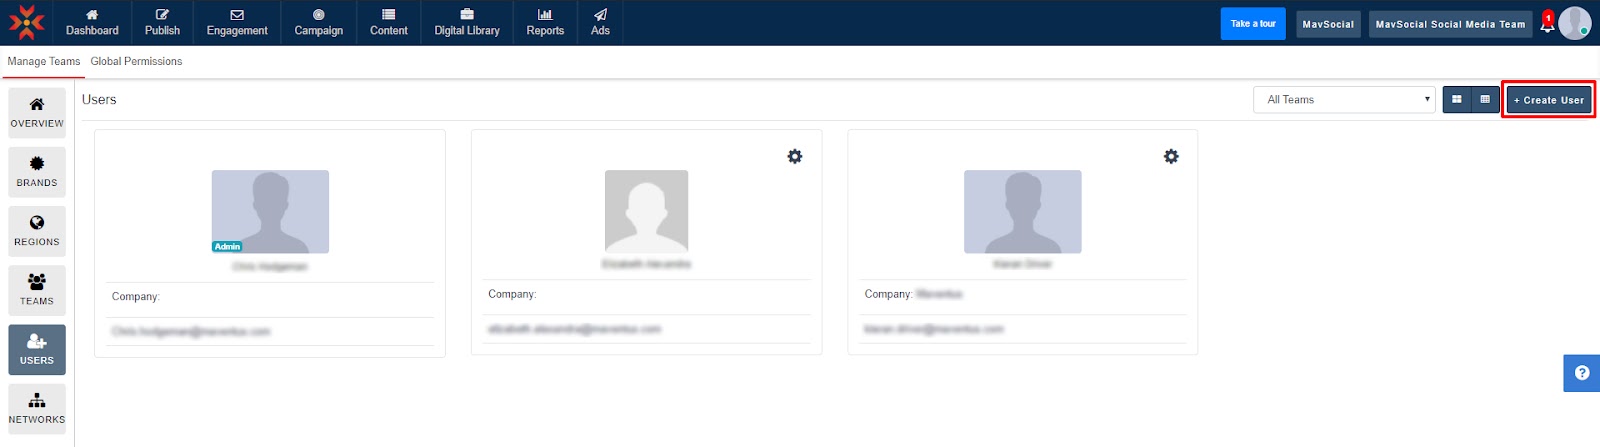
- Navigate to the Users tab.
- Click Create User in the top-right corner of the page.
- Enter all of your member/user’s details in the pop-up sidebar and click Add Member in the bottom-right corner.
- Your new member/user will have been created.
Editing Members/Users
- To edit a member’s details, navigate to Teams & Brands.
- Click on the Users tab on the menu on the left side of the screen.
- Here you will see all users in your organization. To edit one of these users, you must have the authority to do so from the Admin.
You can edit the user’s information by clicking the small settings icon on the right side of the user’s name/profile.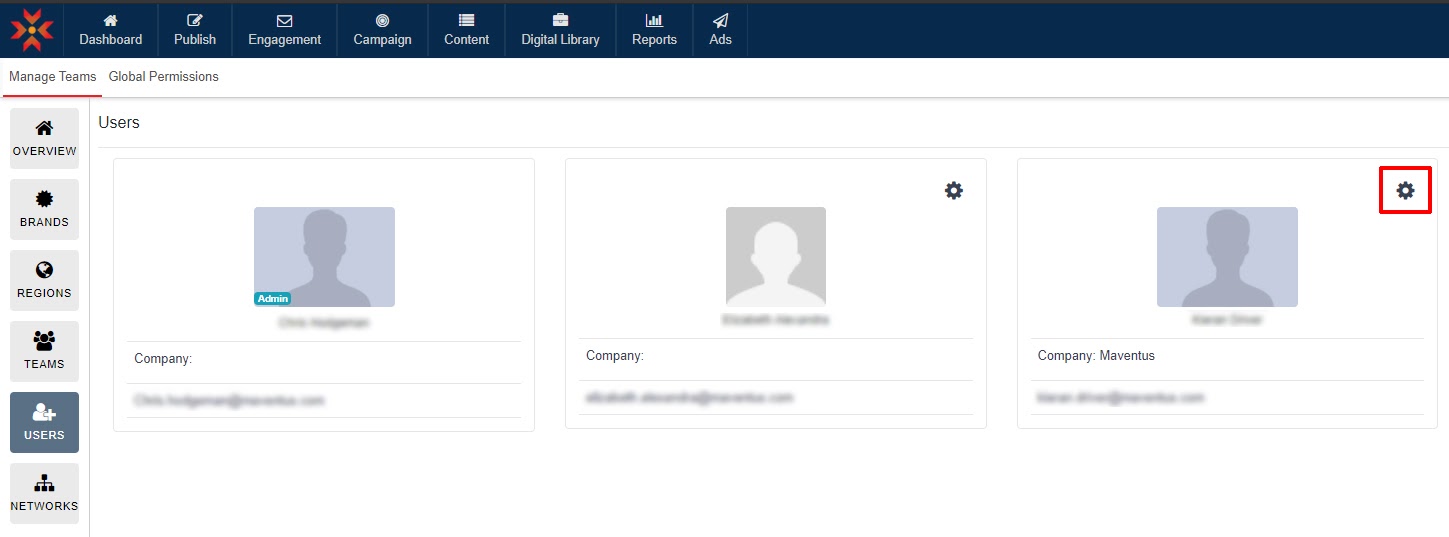
- To finalize your edits, press Update in the bottom-right corner.
Editing User Permissions
- To edit a member’s details, navigate to Teams & Brands and click the Users tab.
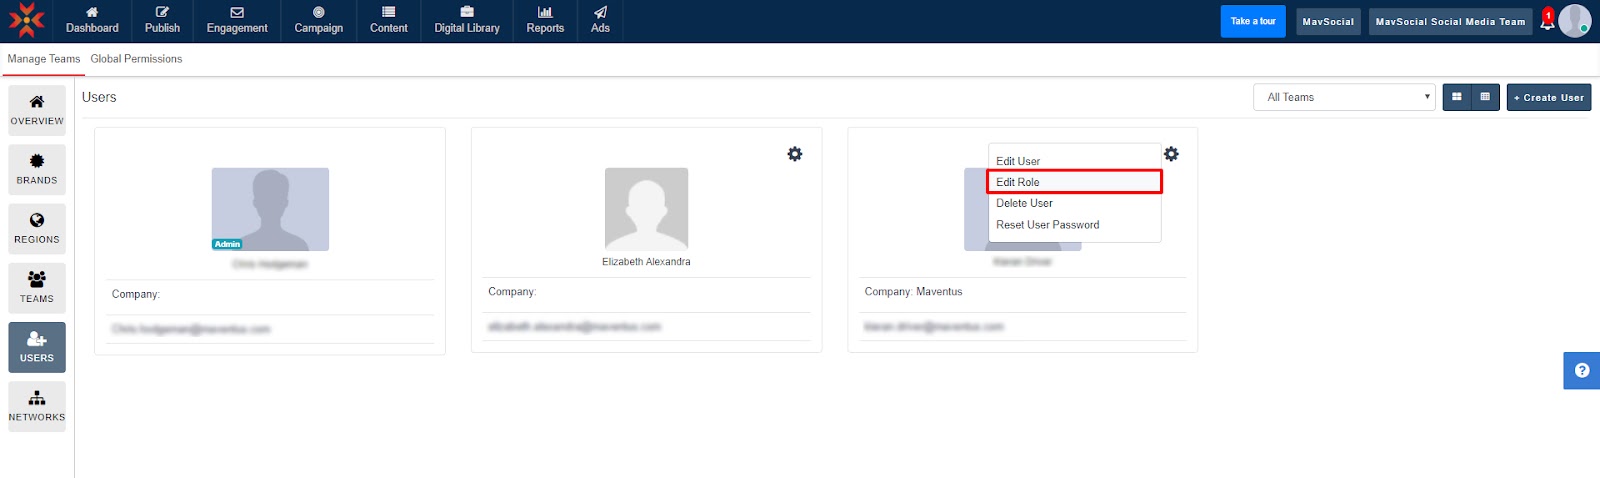
- Find the user whose permission levels you wish to change, and click the small settings icon by their name.
- From the dropdown menu, click Edit Role.
- On the pop-up sidebar, you can change the user’s permission and select the account authority.
There are five roles: Team Admin, Contributor, Approver, No Access, and Custom.
- Team Admin: The Team Admin can access all the functionalities based upon permissions assigned by the Super Admin in the Global Permissions. The Team admin can publish or revert the posts submitted by the Contributor received in mail functionality.
- Contributor: The Contributor can access the permissions based upon permissions assigned by the Super Admin in the Global Permissions page. Contributors don't have permission to publish or schedule posts directly; rather, they can only submit the post. Team admin and Super Admin have the privilege to either publish or revert posts.
- Approver: Approver can view only the Approver page where all pending posts can be seen and can be approved based on team-wise.
- No Access: By assigning No Access, the Team member doesn't have access to any of the pages; instead, an Access Denied page will be displayed in the entire application.
- Custom: By selecting the Custom field, the Super Admin can assign customized permissions to the Team Admin or the Contributor.
To grant the user’s account permission for a task, simply check the checkbox.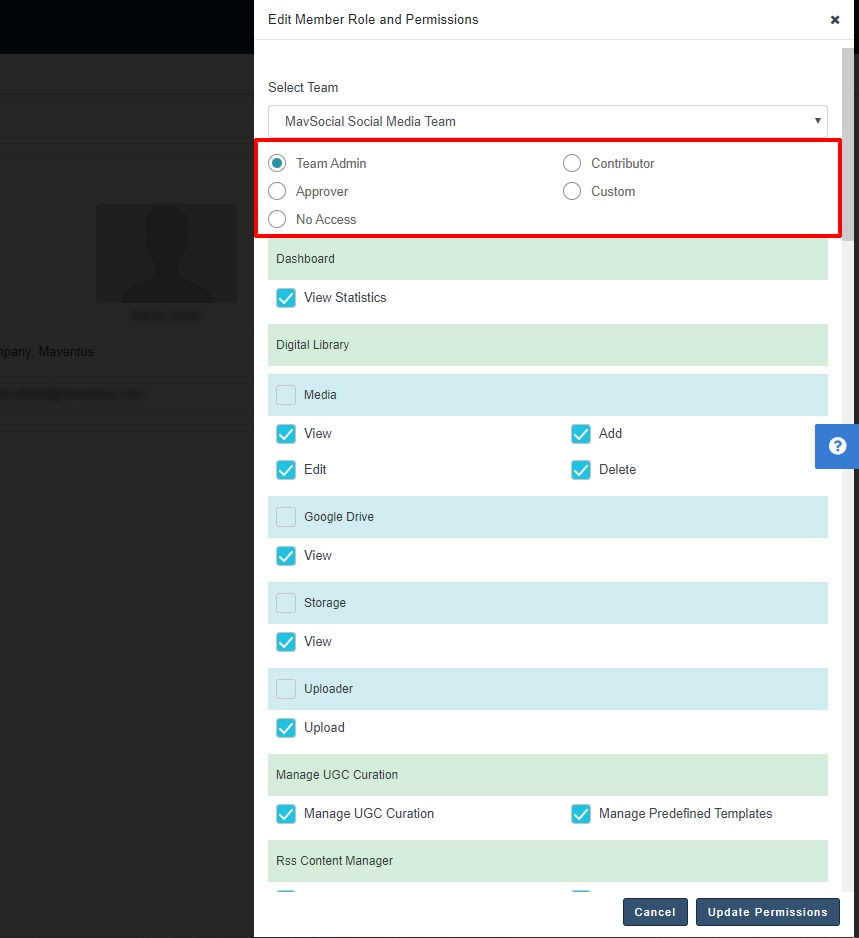
When you’ve finished editing the user’s permissions, make sure to press Update to save and apply your changes.
Comments
0 comments
Please sign in to leave a comment.